
Zoho CRM is a cloud-based customer relationship management (CRM) software that helps businesses manage their sales, marketing, service, and support processes. The tool has a robust feature set, allowing companies to build custom forms to automate tasks and track data.
Zoho CRM allows you to create new forms from scratch or import existing ones into the system. In addition, the tool offers prebuilt templates. These templates can customize to suit your specific needs. You can also use third-party plugins like Ninja Forms for additional functionality.
In this article, I will show you how you can create a Zoho CRM WordPress form using Ninja forms for WordPress.
What are Ninja Forms?
Ninja Forms is an easy-to-use drag & drop form builder plugin with a clean interface. It comes with more than 100 ready-made form elements and layouts.
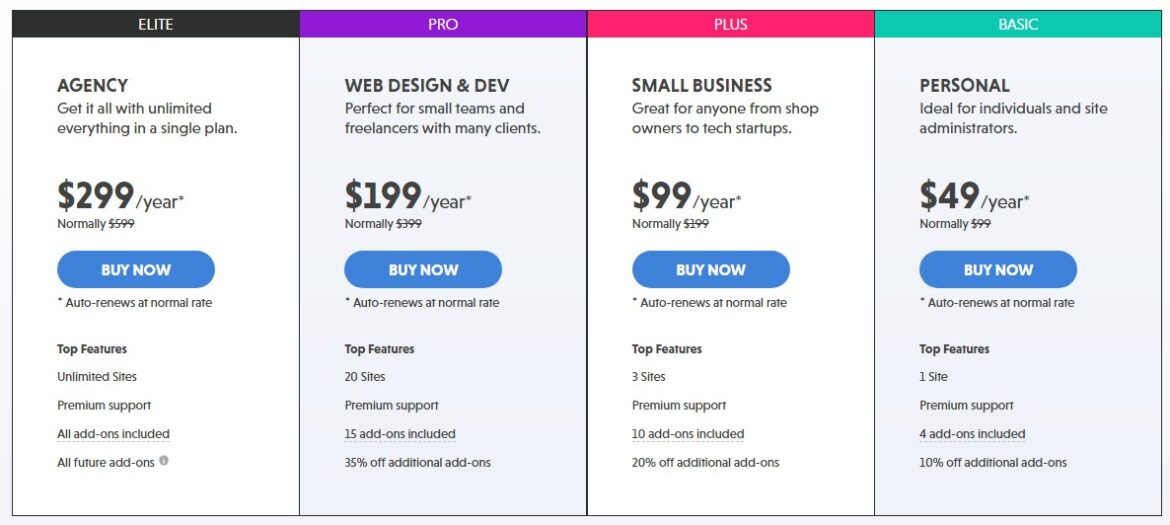
The plugin supports all major browsers, including IE7+, Firefox 3+ and Chrome 5+. The plugin is free to download and use. However, if you want to access premium features, you need to pay $99 per year.
You can install the plugin on any WordPress website by uploading it directly to your server via FTP. Alternatively, you can upload the plugin files manually through the WordPress admin panel.
Disclaimer: Note that some links and banners in this article are affiliate links, which provide us with a small commission if you complete purchases via those links. You can read the affiliate disclosure of our privacy policy in the footer.
How to Setup a Zoho CRM WordPress Form
- How to integrate Zoho CRM with WordPress
- Send custom data from your WordPress form to Zoho CRM
- Sending sensitive data to Zoho CRM
1. How to integrate Zoho CRM with WordPress
Zoho CRM isn’t that complicated, and your integrations shouldn’t be either. We’re here to show you how easy it is to connect your Zoho CRM to your WordPress site, so you can easily add a Zoho CRM form to your WordPress website.
All you need is your free Ninja Forms plugin, an active Zoho CRM account, and our Zoho CRM add-on that bridges your WordPress form and the Zoho CRM software. With just these three tools, you can create forms for your site and then send them to your Zoho CRM account.
Linking your Zoho CRM account to WordPress Forms
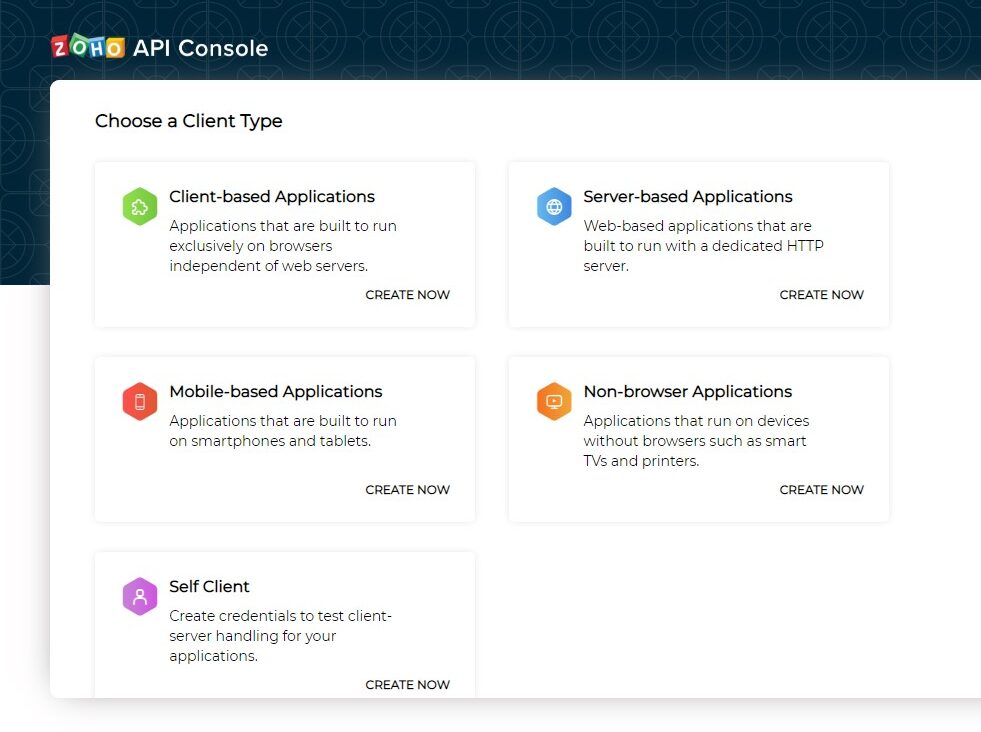
You first need to install the ZOHO CRM add-on for your WordPress site. Next, link your Zoho CRM to WordPress by creating a connected app. Go to the Zoho API console URL and click “Self client” and “Create”.
This will automatically generate a Client ID and Client Secret. On the left side, you will need to create code. Set the “Scope“ to ZohoCRM.modules.all and set the “Scope Description“ to Ninja Forms. Please note the Time Duration indicates the validity of the generated tokens. Click Create to generate the code. (authorization token).
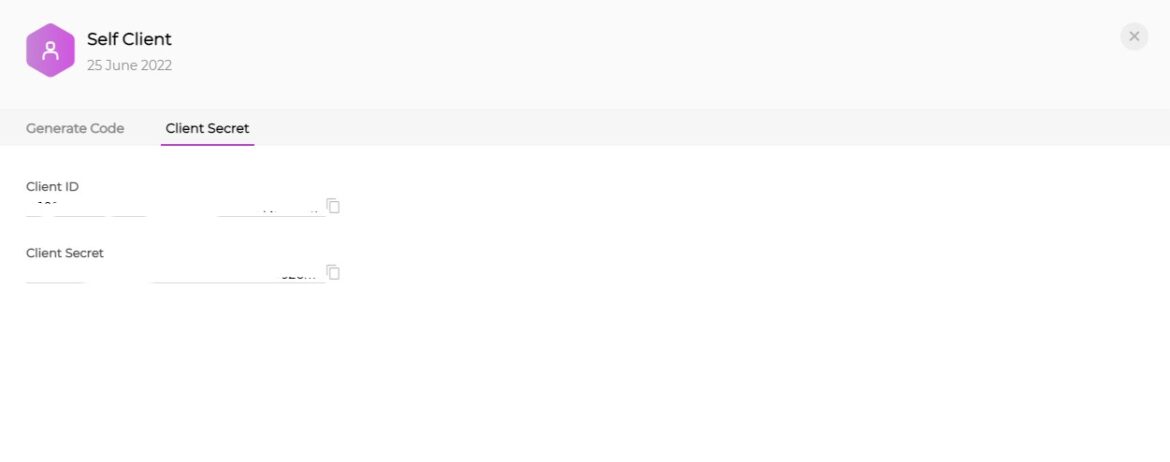
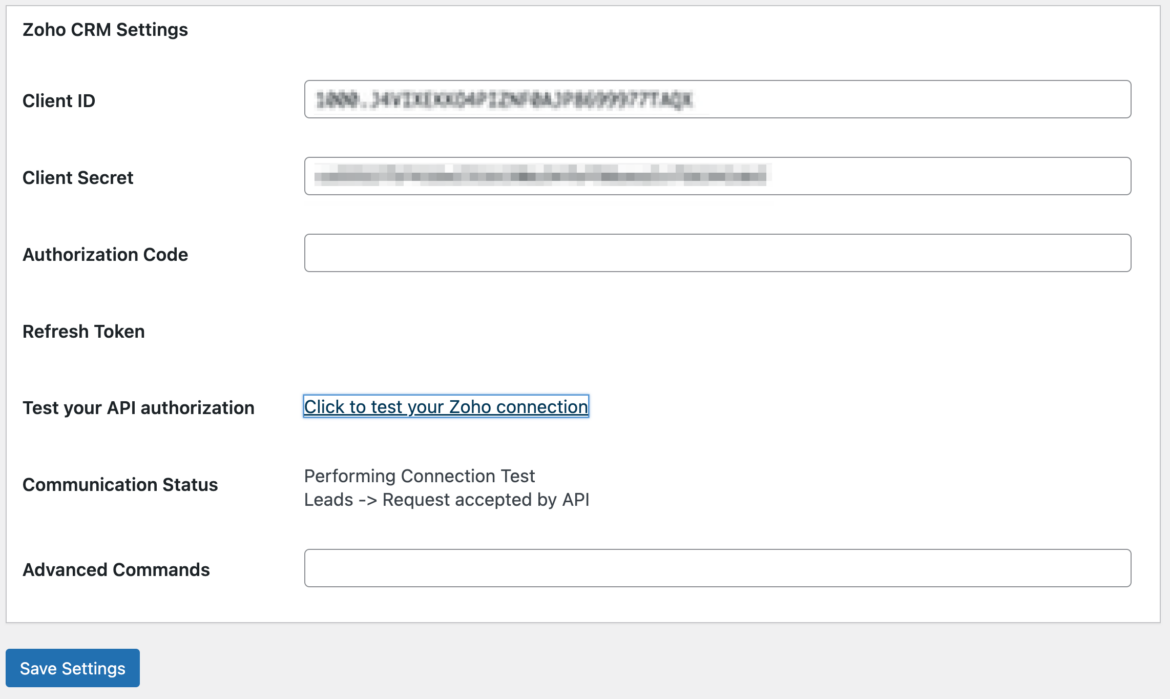
From the Ninja Form dashboard, go to Settings > Zoho CRM Settings. Paste the client id, secret and authorization code you generated in Zoho API Console into the respective fields. After entering the authorization code, click save settings and test your Zoho Connection.
That’s it. You just linked your Zoho CRM account with your WordPress website. We will show you how to create a Zoho CRM WordPress form.
Add a contact from your WordPress form to your Zoho CRM account (field mapping)
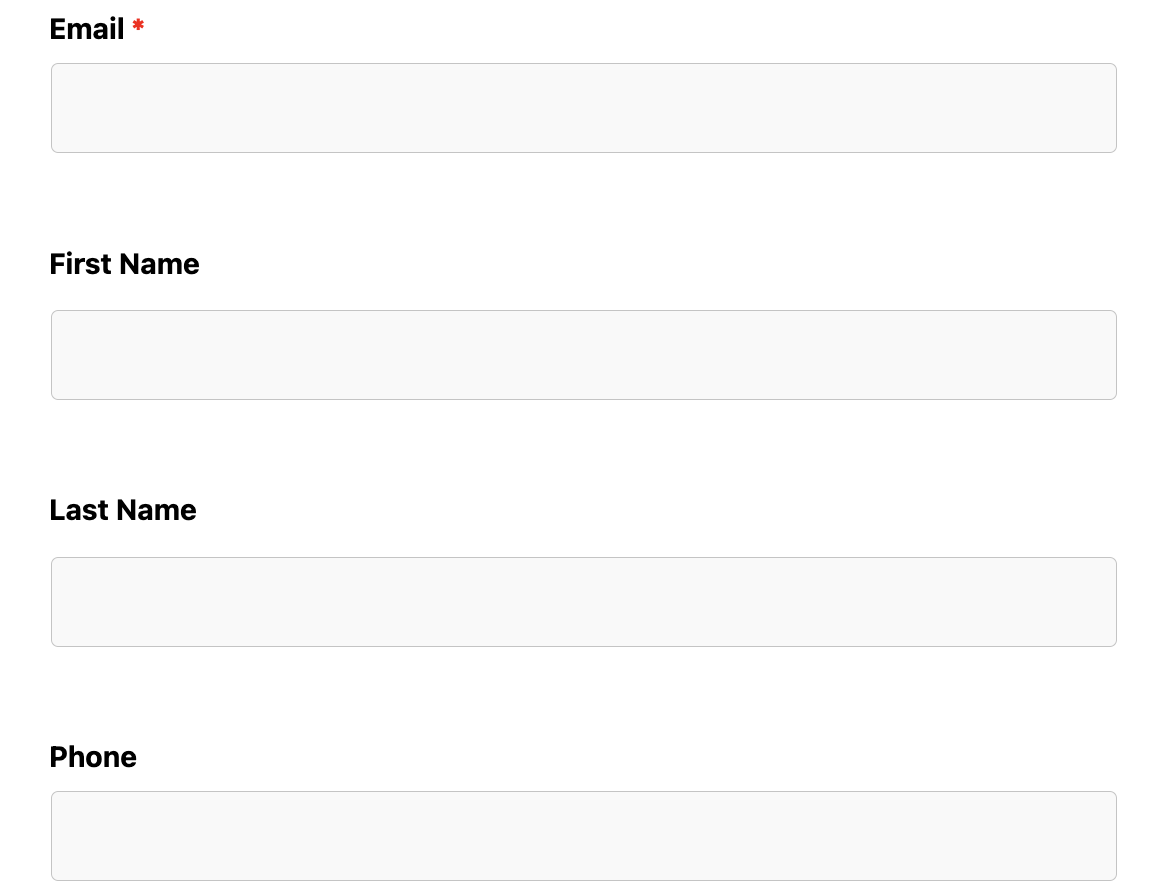
Once you’ve connected your WordPress forms to Zoho CRM, you can start sending contacts to Zoho. You can do this using the “Add to Zoho CRM” action. We created simple form fields for demonstration purposes. We’ll map them to Zoho CRM later.
Next, click Email & Actions. Click the blue + icon in the lower right corner and then click Add To ZohoCRM Action. When you choose this option, you can see a Zoho Field map under the action name.
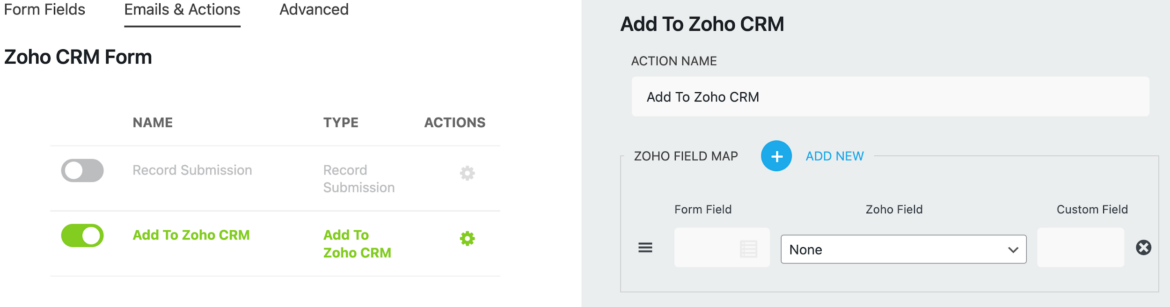
Now, you want all existing WordPress form fields mapped to Zoho CRM so you can easily import them into Zoho CRM. You can add new fields by clicking Add New next under the Zoho Field Map section. Click on the merge tag icon to pull out the form fields and map them to the correct Zoho Form. Then, make sure they’re mapped to the correct module.
It would be best if you remembered that the Zoho CRMs add-on creates only one new record and doesn’t update existing ones. If any human or automated bot enters a matching email address, they could delete or overwrite all the existing entries in your account.
For this reason, this decision was made to prevent spam-type submissions from corrupting valid data in Zoho CRM to protect against malicious updates. For security reasons, transferring files from Zoho CRM to any other system is impossible.
If you don’t want to allow duplicate values in specific fields in your modules, go to your Zoho CRMs account, navigate to Customizations > Modules and Fields > Select the module and click Create & edit fields. Select the field you’d like to make changes and click “Do not allow duplicate values.”
2. Send custom data from your WordPress form to Zoho CRM
Zoho CRM has plenty of fields available, but it’s not always enough. What if you are collecting specific data on your WordPress form and you need to use custom fields?
To send the custom data successfully, you’ll need three things: create form fields on your WordPress form, create custom fields under the desired Module in Zoho CRM, and finish mapping these fields on your WordPress form.
Create a custom field in your Zoho CRM account
Let’s say your form fields are set up in Ninja Form. If you need to refresh your memory on form creation, you can check out this tutorial, on building a form.
Now, you want to go to your Zoho CRMs Account to create custom fields matching the form. Go to your Zoho CRMS Account and click the gear icon, which opens the setup dashboard. Click Customization > Module and Fields.
Clicking this button will open the list of available modules. Click on the module where you want to add a new custom field. We chose Contacts Module for our example.
Click on the Fields tab and then click the blue button Create & Edit Fields. You will see the existing fields listed under the Contact module, but you want to concentrate on the table on the right that says New Fields.
To create a custom field, choose an area where you’d like to add the field. Then drag the field from the Toolbox onto the list under the Contacts Module. Please note that the creation of custom Modules is not supported in the Zoho CRM add-on.
When choosing your custom fields, you need to consider two things: what kind of data they contain and how they’re displayed to the form user. For example, if the data sent is text, you would select Single Line.
Map custom fields data from WordPress to Zoho CRM
If you successfully added a new custom field to your Zoho CRM account, ensure that the label for the field matches the label on your WordPress form. Below is an example of creating a custom text field in CRM.
This custom field was added under the Contacts module. Since this is a Custom Field, you’ll want to select the module that says “Custom”. We’ve already created the area under Contacts, so let’s choose Field Zoho Contact custom. You’ll then want to fill in the details in Custom Fields.
To check whether your contacts have been successfully transferred to Zoho CRMs, go to Ninja Form’s dashboard > settings > Zoho CRM Settings > Communication Status > If there is an error, this would be where you’d see the error message.
That’s all! You’ve just learned how to create a Zoho CRM WordPress form in our step-by-step guide.
3. Sending sensitive data to Zoho CRM?
Your organization might store sensitive data in the ZOHO CRM. Securing this sensitive data, such as personally identifiable information (PII), or protected health information (PHI), is a critical concern for organizations. While Ninja Forms has built-in security features to prevent malicious code from being uploaded, Ninja Forms relies on your server’s security.
We don’t recommend saving sensitive data when you integrate your WordPress forms with Zoho CRM. All the data is protected by default when you install WordPress. Ninja Forms allows you to disable the Record Submission button so that no data will be saved to your server. If you disable this option, your data will be transferred to the Zoho CRM system.
However, if you decide to store your submissions with personally identifiable information, you can set them to expire. You can also mark specific fields as personally identifiable data.
When the Ninja Forms system processes the Delete Data Request, all personally identifiable data on your form will be removed rather than deleted. Check this blog post to learn more about General Data Protection Regulation(GDPR).
Build a Zoho CRM WordPress Form
Integrating your WordPress website with Zoho CRM is easy. Once you have completed these steps, you can send and receive leads, contacts, and other essential business data between your website and Zoho CRM.
To learn more about integrating your website with Zoho CRM, Save time and money by integrating your WordPress website with Zoho CRM today. If you don’t have a Zoho CRM account yet, start a Zoho CRM free trial today.
The integration process is simple. All you need to do is follow the instructions above. This way, when there is a form submission on your website, Zoho CRM stores information about your potential customers.
Now go ahead, build a form with the correct input fields, and capture leads for your business to


