Looking to change your site favicon in WordPress? Whether you’re new to managing a WordPress site or looking to refresh your site’s visual identity, updating your favicon to your WordPress is a small yet impactful step. A favicon, often referred to as a site icon or site logo, plays a crucial role in branding by appearing in browser tabs, bookmarks, and search results.
In this blog, we’ll walk you through various methods to change your favicon, ensuring it enhances your site’s professional online presence and boosts brand recognition.
Let’s dive into the step-by-step processes, tips, and tools you need to make your site’s favicon stand out!
What is a Favicon and Why is it Important?
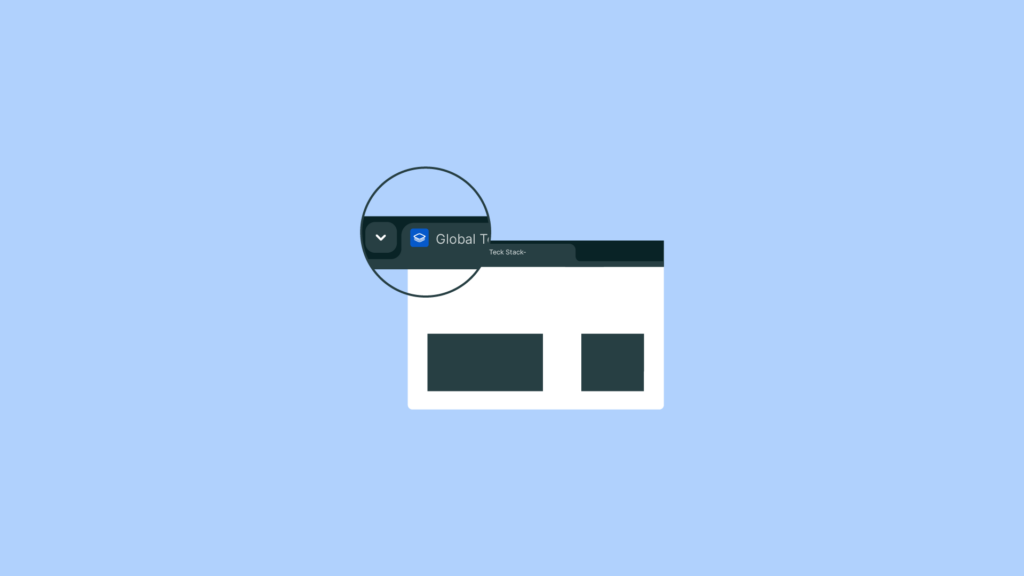
A favicon, also known as a WordPress site icon, favicon icon, site icon, or site logo, is a small icon representing your website’s brand, displayed in browser tabs, bookmarks, and various other places. Favicons significantly enhance brand recognition, establish a professional online presence, and improve user experience. Websites with a clear and recognizable favicon often enjoy increased return visits.
When discussing file formats and sizes, it is crucial to understand the importance of a favicon image and its role in different formats. Properly formatted favicons ensure compatibility across various devices and browsers.
The standard size for a favicon is 16×16 pixels, which is the size displayed in the browser tab. This visibility in the browser tab helps users quickly identify and switch between multiple open tabs, enhancing the overall user experience.
Favicon File Formats and Sizes
When it comes to creating a favicon for your WordPress site, understanding the various file formats and sizes is crucial. Favicons can be saved in several formats, including ICO, PNG, GIF, and SVG. The ICO format is highly recommended because it is universally supported by most browsers, ensuring your favicon displays correctly across different platforms.

While PNG and GIF formats are also widely supported, they may not be compatible with older browsers. On the other hand, the SVG format is ideal for modern browsers due to its superior scalability and flexibility, allowing your favicon to look sharp on any device.

The standard size for a favicon is 16×16 pixels, perfect for browser tabs. However, creating your favicon in multiple sizes, such as 32×32, 48×48, and even 512×512 pixels, ensures it looks great on various devices and platforms, including app icons. This multi-size approach guarantees that your favicon remains clear and recognizable, whether viewed on a desktop, tablet, or smartphone.
To optimize your favicon for web use, consider compressing the file size and choosing the appropriate format. This not only improves loading times but also ensures a seamless user experience across your WordPress site.
Creating a Favicon
Creating your favicon is straightforward with tools like Favicon.cc, Faviconer, or Adobe Photoshop. Select an appropriate size based on your target devices and resolutions—commonly 16×16 pixels for browser tabs or up to 512×512 pixels for various app icons.
Design your favicon with these dimensions and resolution settings in mind, and save it in the correct format (.ico or .png). Favicon files are crucial for enhancing your site’s identity, and you can generate them using a favicon generator.
Convert an image file into the necessary formats for a favicon using these tools. WordPress users may benefit from favicon generator plugins that simplify favicon creation and management. You can also add a favicon manually using FTP and code editing.
Adding a Favicon to WordPress
Using the WordPress Customizer
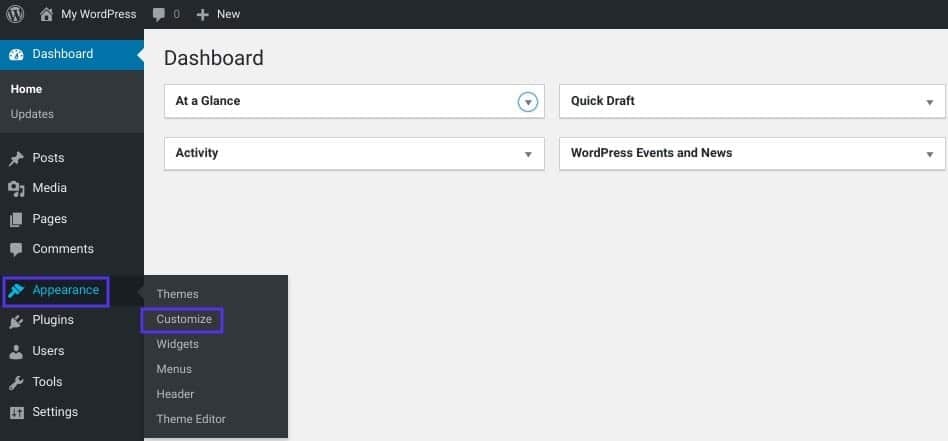
Log into your WordPress admin panel.
Navigate to Appearance > Customize.
Click on Site Identity.
Under Site Icon, upload your favicon.
Crop if necessary, and then save your changes.
Changing Favicon Through General Settings
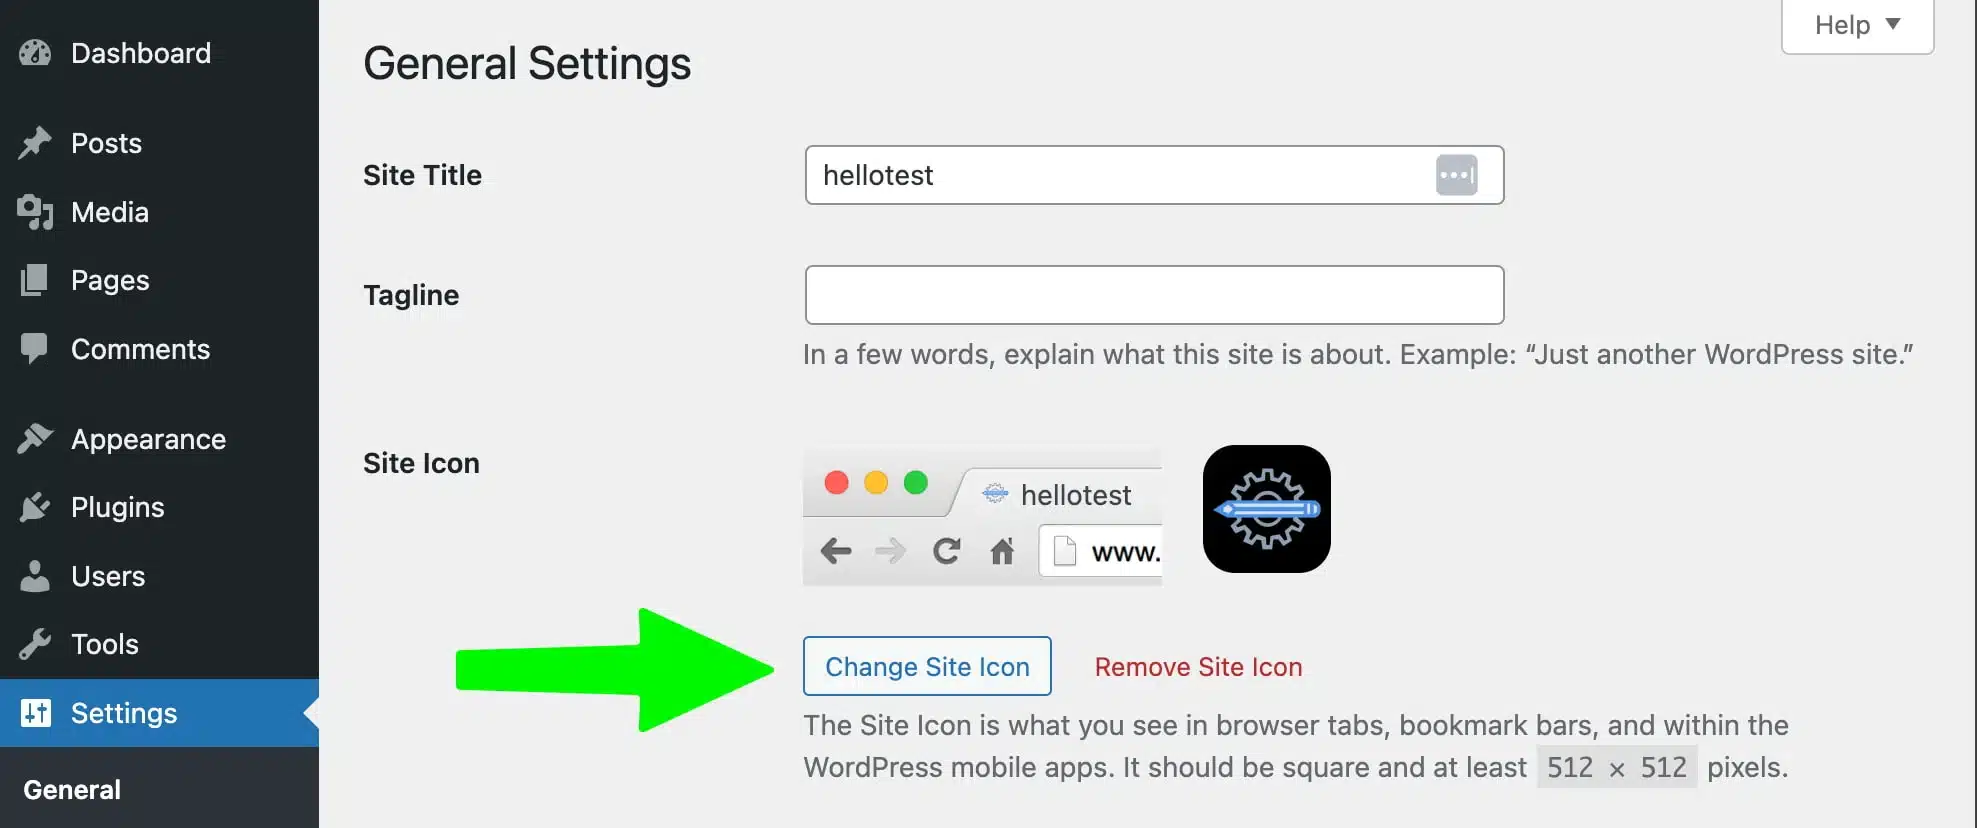
Log into Your WordPress Dashboard: Begin by logging into your WordPress admin panel.
Navigate to Settings: Go to Settings > General.
Site Icon Section: Scroll down to find the Site Icon section. Here, you can upload a new favicon image.
Upload Your Favicon: Click on the Select site icon button to upload your favicon file. Ensure that your favicon is a square image for best results.
Crop and Save: If necessary, crop the image to fit the required dimensions. Once done, save your changes.
Using the General Settings method offers a straightforward approach to updating your site’s favicon, ensuring it appears correctly across browser tabs, bookmarks, and search results.

Using a WordPress Favicon Plugin
Alternatively, plugins like Favicon by RealFaviconGenerator streamline favicon customization, ensuring optimal compatibility across devices and app icons.
Adding HTML Code Manually
Upload your favicon file to your WordPress media library.
Obtain the file URL and add the following HTML to your site’s header:
<link rel="shortcut icon" href="https://example.com/favicon.ico" />Replace the URL with your favicon’s URL. Insert this code in your theme’s header.php or use plugins like Code Snippets to simplify the insertion.
SEO Benefits of a Favicon
Incorporating a favicon into your WordPress website offers several SEO benefits that can enhance your site’s overall performance. A well-designed favicon boosts brand recognition and establishes a strong online presence, making your site more memorable to visitors. This increased recognition can lead to higher user engagement and more return visits, which are positive signals to search engines.
A favicon also helps differentiate your site from competitors, providing a unique identity that stands out in browser tabs and bookmarks. This distinctiveness can improve your site’s search engine rankings by reducing bounce rates and increasing the time users spend on your site.
Moreover, favicons can appear as site icons in search engine results pages (SERPs), making your site more visible and recognizable. This visibility can drive more traffic to your site, further enhancing your online presence. Additionally, favicons are often used in social media platforms and other online services, extending your reach and reinforcing your brand across the web.
Optimizing your favicon for search engines involves using relevant keywords and descriptions, which can further improve your site’s SEO. Lastly, a favicon serves as a trust indicator, increasing user confidence in your site and encouraging them to explore your content more deeply.
By thoughtfully designing and implementing a favicon, you not only enhance your site’s visual identity but also leverage its SEO potential to attract and retain more visitors.
Troubleshooting Favicon Issues
If your favicon isn’t displaying correctly, consider the following troubleshooting steps:
Ensure the favicon file is uploaded properly and verify the accuracy of the file path.
Confirm the favicon format is compatible with your theme and WordPress version (use .ico or .png).
Clear your browser cache and refresh the page, or test the website in a different browser to rule out cache-related issues.
Verify no conflicts with plugins or theme-specific settings are preventing your favicon from displaying correctly.
Favicon Image Design Tips
Create a simple, easily recognizable design that clearly represents your brand.
Maintain consistency in color scheme and typography aligned with your website’s overall branding.
Use transparent backgrounds for versatility across different platforms and backgrounds.
Ensure your favicon scales well and maintains clarity at various sizes and resolutions. Use the site logo block in WordPress to manage the favicon and ensure it aligns with the site’s branding.
WordPress Multisite Favicon
Managing favicons for individual sites within a WordPress multisite network can be complicated. Plugins designed specifically for multisite setups streamline this process:
All In One Favicon: Simplifies favicon management on multisite installations.
Fresh Favicon: Allows easy customization of favicons across multiple sites.
Branda Pro: Offers comprehensive customization options for favicons and additional branding elements across your multisite network.
These plugins ensure cohesive branding and an enhanced user experience across every website in your multisite network.
Conclusion
Updating your favicon in WordPress significantly enhances your site’s visual identity and usability.
Follow the methods outlined here to ensure your favicon appears correctly and consistently, boosting your brand’s online presence and improving user experience. Design your favicon thoughtfully—simple, scalable, and aligned with your brand identity.
Frequently Asked Questions (FAQ)
How do I change the favicon on a WordPress site?
To change the favicon on your WordPress site, you can use the WordPress Customizer by navigating to Appearance > Customize > Site Identity and uploading your new favicon under the Site Icon section. Alternatively, you can use a WordPress favicon plugin or manually add the favicon using HTML code.
How do I change the link icon in WordPress?
Changing the link icon, or favicon, in WordPress can be done through the WordPress Customizer or by using a plugin like Favicon by RealFaviconGenerator. These methods allow you to easily update and manage your site icons.
How to change favicon in WordPress Elementor?
In WordPress Elementor, you can change the favicon by going to the WordPress Customizer, selecting Site Identity, and uploading your new favicon under the Site Icon section. Elementor itself doesn’t have a direct option for changing the favicon.
How to change header icon in WordPress?
The header icon, or site logo, can be changed by navigating to Appearance > Customize > Header in your WordPress dashboard. Here, you can upload a new site logo or header icon that aligns with your brand.
How do I add a favicon in WordPress?
To add a favicon in WordPress, go to Appearance > Customize > Site Identity and upload your favicon under the Site Icon section. You can also use a WordPress favicon plugin for more customization options.
How do I get a favicon URL in WordPress?
After uploading your favicon to the WordPress media library, you can get the favicon URL by clicking on the image and copying the URL from the media details page. This URL can be used in HTML code or plugins.
Why is my favicon not showing up in WordPress?
If your favicon is not showing up, ensure that the file is correctly uploaded and the file path is accurate. Clear your browser cache or try a different browser, and verify that there are no conflicts with plugins or theme settings.
What size should a favicon be in WordPress?
The standard size for a favicon is 16×16 pixels, but it’s recommended to create multiple sizes like 32×32, 48×48, and 512×512 pixels to ensure compatibility across various devices and platforms.
How do I add a favicon to a WordPress site?
You can add a favicon to your WordPress site by going to Appearance > Customize > Site Identity and uploading your favicon under the Site Icon section. Plugins can also be used for more advanced options.
How do I add a favicon to my website?
To add a favicon to your website, upload the favicon file to your server, then add the following HTML code to your site’s header:
html <link rel=”shortcut icon” href=”https://example.com/favicon.ico” />
Replace the URL with the path to your favicon file. This code can be added to your theme’s header.php file or via a plugin like Code Snippets.


